An Intro to Git and GitHub Tutorial for Beginners
After devouring the common git terminologies, its time to get a thorough knowledge about what is GitHub, how to make a GitHub account, and about the basic git commands. So if you are the one who doesn't know about Github and how to use git, then this section is mainly for you.

Let’s create an account on GitHub
GitHub is an online open-source through which one can easily share the projects from anywhere in the World. It works perfectly in sharing and creating the data. Learn from the below images that we have shown, and we undertook with our best to make you understand how to make a GitHub account and repository.
How to sign-up in GitHub
First- for the sign-up, go to any browser, type github.com and hit enter.
Then, you will find GitHub’s home page that asks you to either login or sign-up. If you already have an account, then you can simply put your username and password.
Remember, that interface is only for those who had already an account on GitHub.
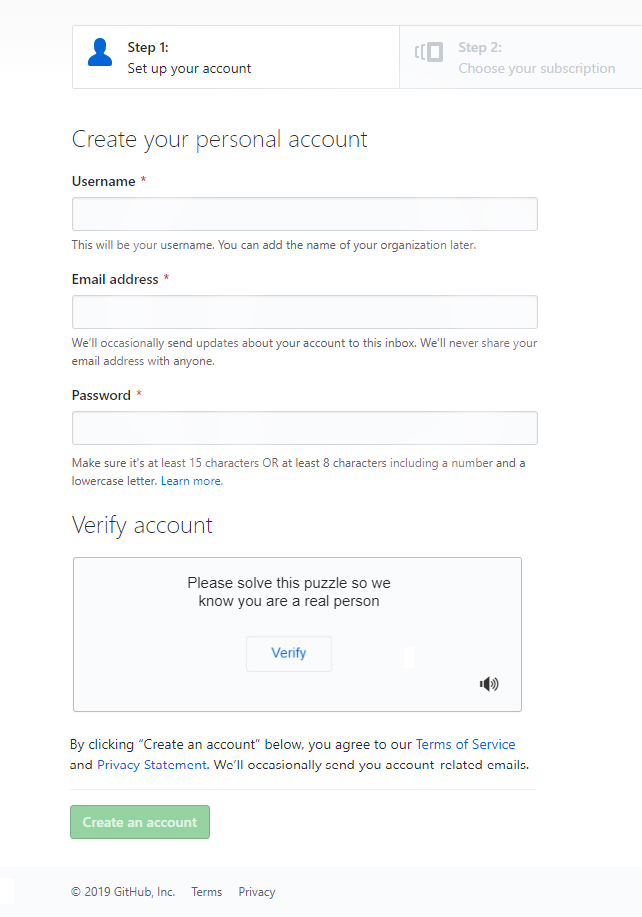
But if you're new to it, and you’re not aware, then you just need to tap over the sign-up button and simply add your details in the sign-up form given. Add your email address via you wanna run your GitHub account.
Then, using the same username and password, you can log in to your GitHub account.
After signing in, you will see the main GitHub dashboard page
*Congratulations* your account has been created and you have successfully logged in.
Now, you might be wondering what the heck is GitHub. Right?
Don’t worry we’ll tell you what is GitHub in actual, okay! So Let’s start with GitHub.
1. What is GitHub?
GitHub is an open-source code hosting platform that is quite interesting and easy to learn. It isn't just for the developers but it's for the learners as well. GitHub provides plans for free, professional and so for beginners too. Here, the beginners must know that the GitHub projects can be simply used, and the free accounts mainly work to host the open-source.
GitHub platform designed for code hosting where the collaboration and version control can be easily done on it. It lets you and others work together on projects from anywhere.
Git serves the foundation for many services, like GitHub, Bitbucket, and GitLab, but you can handle the Git without using any other service.
Now, do remember if you’re learning GitHub, you are learning BitBucket and GitLab simultaneously. You can use Github both privately or publicly. Github itself holds many of the features such as,
1. It is a free and open-source platform except for some advanced tools we need to pay.
2. And Git holds the compatibility with the existing systems & protocol.
3. Git is quite fast, secure, scalable, and fully reliable.
4. Moreover, Git supports non-linear development as well.
2. Now let's move on its common Repositories
In a Git, there are some of the commands that interact with a repository. Mainly, Git commits to the main server as a “repository”.
The “Terminal” performs a major role in sharing and collecting data with teammates. Remember wherever you are, you can easily commit & push on the terminal even without the internet access and when the internet will access it will instantly make changes in the repository.
On the other hand, one can easily access the repository and clone the whole data through the terminal. We can use GitHub on our local systems as well by installing git software and then following some commands to do the operations.
3. How to Create a Repository
Its very simple to create a repository on GitHub. You have to simply log in to your account. There you will see a "+" icon in the title bar, just click on that icon and you will see a dropdown. Choose a new repository from the dropdown and it will take you to a new page. In that new page, you can add your repository name and other details and then hit the create repository button. Your repository will be created.
For working with the repository there are two ways. You can work on the web as well as using the terminal on your system. These two major methods play a crucial role in repository management.
On the GitHub dashboard, you will see all the options like upload files, add, remove, etc to play with your GitHub repository. Playing with GitHub using the terminal is simply for the people who like working with the terminal. If you want to use GitHub through the terminal, then you need to install git software on your system.
Moreover, the git software is available at https://git-scm.com/.
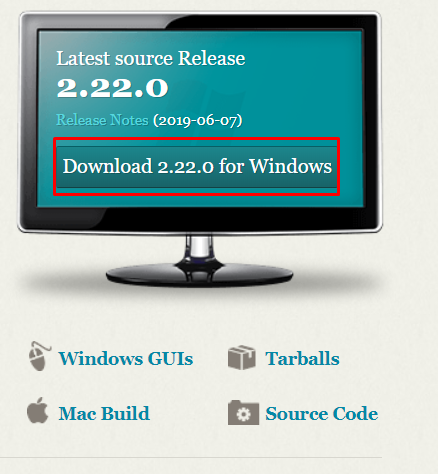
And, after installing this software, simply follow the following commands to play with Github. One significant benefit of using GitHub using the terminal is that you can push any file of larger size into your repository whereas there are some restrictions of file upload size over the web.
Now, to create a new repository, one must need to understand the following steps.
- Click on the “Create Repository”
- “Add” any repository name. (here, just remember if you have spaces in your repo name, GitHub will automatically replace them with hyphens)
- Then choose “public option”. You can choose the “Private option” if you don’t want your repository to be available for others.
- At last “click” on the “create repository”
After creating the repository, the next dashboard would be your interface, including commands that use to push the files and other data into the repository.
*“git init”
“git add”.
“git commit -m”
“git remote add origin https://github.com/username/repositoryname.git tells you the path of the remote (if you have spaces in your repo name, GitHub will automatically replace them with hyphens)
“git push -u origin master”
Now let’s understand what these commands state to do when you are working locally.
“Git init” creates the local empty repo and used to “initialize” it.
“Git add”. used in to “add files” or any other data
The “Git commit-m” this command is used to save your changes to the local repository.
“Git remote add origin https://github.com/username/repositoryname.git, tells you the path of the remote (if you have spaces in your repo name, GitHub will automatically replace them with hyphens)
“Git push -u origin master” used to push the files from the remote repository
Note: These commands can be used in the local or terminal repository.
4. What is a branch in GitHub?
Branches mainly separate the section or files into many other fields. Changes in the branch will not affect your main branch. The main branch can be created by the admin only and they divide the sections into many other branches.
In the later section, we will tell you about how to create branches in Github.
As you did on GitHub, now it's time to go back to create a branch based on master. To create a branch you need to follow some of the major steps like:
- First, go to GitHub and "Log in" to your account
- Then it will show you the "dashboard"
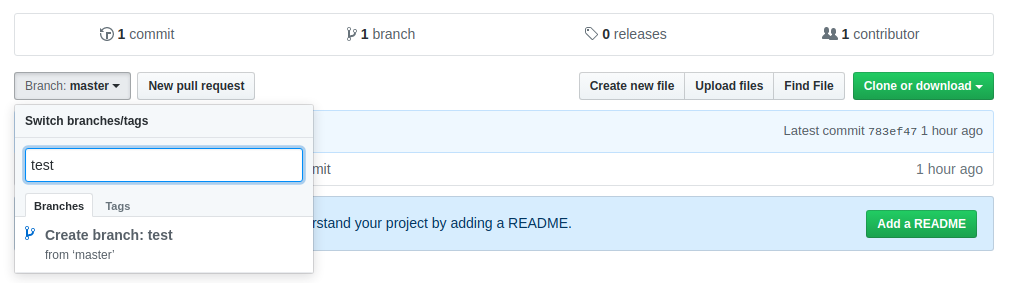
- "DropDown" on the Branch Master
- Then "Enter" anything (eg. "test")
- Now your branch is successfully created.
And if you want to "delete the branch" that seems not valuable to you then follow the below steps:

1. "Click on the Branches"
2. Choose your branch
3. It will show you the "delete icon" through you can simply delete the branch.
5. Clone the Repository
See, when you create a repository on GitHub, it means that exists as a remote Repository. So, you can clone your repo to create a local copy on your computer and work accordingly on the project. When you work locally, no changes would happen in the actual repository.
Now, If you are unable to get the idea, then look at the below section we've explained through the simple and easy steps.
- “Create” a folder on Desktop
- “Open” the created folder with GitBash
- Put the clone command like “git clone github.com/username/test.git”
- Then hit “Enter” it will initiate the cloning process

This is a simple process of cloning the repository. You can simply clone by such steps. Now let's move on to the staging area part.
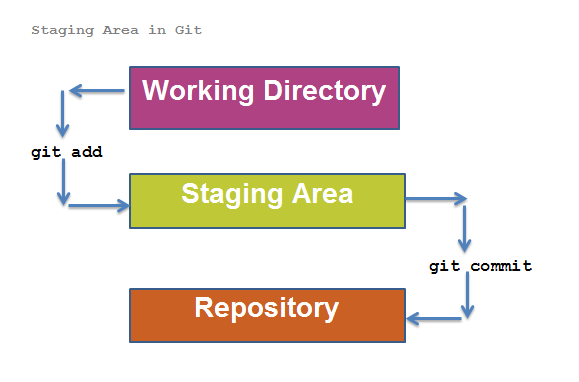
6. Staging Area
The staging is a simple file, and it helps in reviewing the changes. It is one of the most essential processes in Git. Before the committing method, the file will be saved in the staging area. Look at the below image, you will get the idea clearly.
Conclusion
In this blog, we have mentioned everything from creating an account to the staging area in git. We at Paradise aims to reach the learners' desire. Our main motive is to proffer the best tutorials and so with did with this blog. Hope it will help you in creating and running the Git account. In our upcoming blogs, we will discuss BitBucket and GitLab as well.
Comments
Post a Comment